
The Workbench Access Module allows you to limit content editors’ access to specific sections of your website.
Quickstart gives you the option to set editor access for different users for different sections of your website. This can be done based on Menus or based on Taxonomy terms. This allows you to restrict editing privileges to various content.
To enable the module, an Admin needs to go to Manage > Extend and search for Workbench Access and install it.
To set access permissions:
- Go to Manage > Configuration > Workflow > Workbench Access
- IMPORTANT: Click the Settings button and ensure the box labeled “Deny access to unassigned content” is checked. Without checking this box, the section access settings won’t work!
- Click back to Schemes.
- Click the Add Access Scheme button.
- Enter a Label and Plural Label for the scheme.
- Under the Access Scheme dropdown select Menu or Taxonomy.
- Save
- If you choose Menu, a list of Menus and Content Types will appear. Select any menus you wish to modify access to and which content types.
- If you choose Taxonomy, a list of Vocabularies will appear. Select any terms from this list you wish to modify access to.
- To modify access for different Editors on different pages, return to the Access Schemes overview page.
- In the Operations column on the right, click the Sections button for the Access Scheme you want to edit.
- Click the links under the Editors and Roles columns to assign individual users edit access to specific pages, or give entire roles access to specific pages.
- Note that permissions “flow down.” So if you give an editor access to a menu, or sub menu, they will also have access to the items contained within that menu. So it is only necessary to grant access permissions to the highest parent element.
This guide provides step-by-step instructions on how to set up workbench access controls. By following these steps, you can ensure that only assigned content is accessible and that access is denied if any scheme does not provide access. It is essential for maintaining security and control over your website.
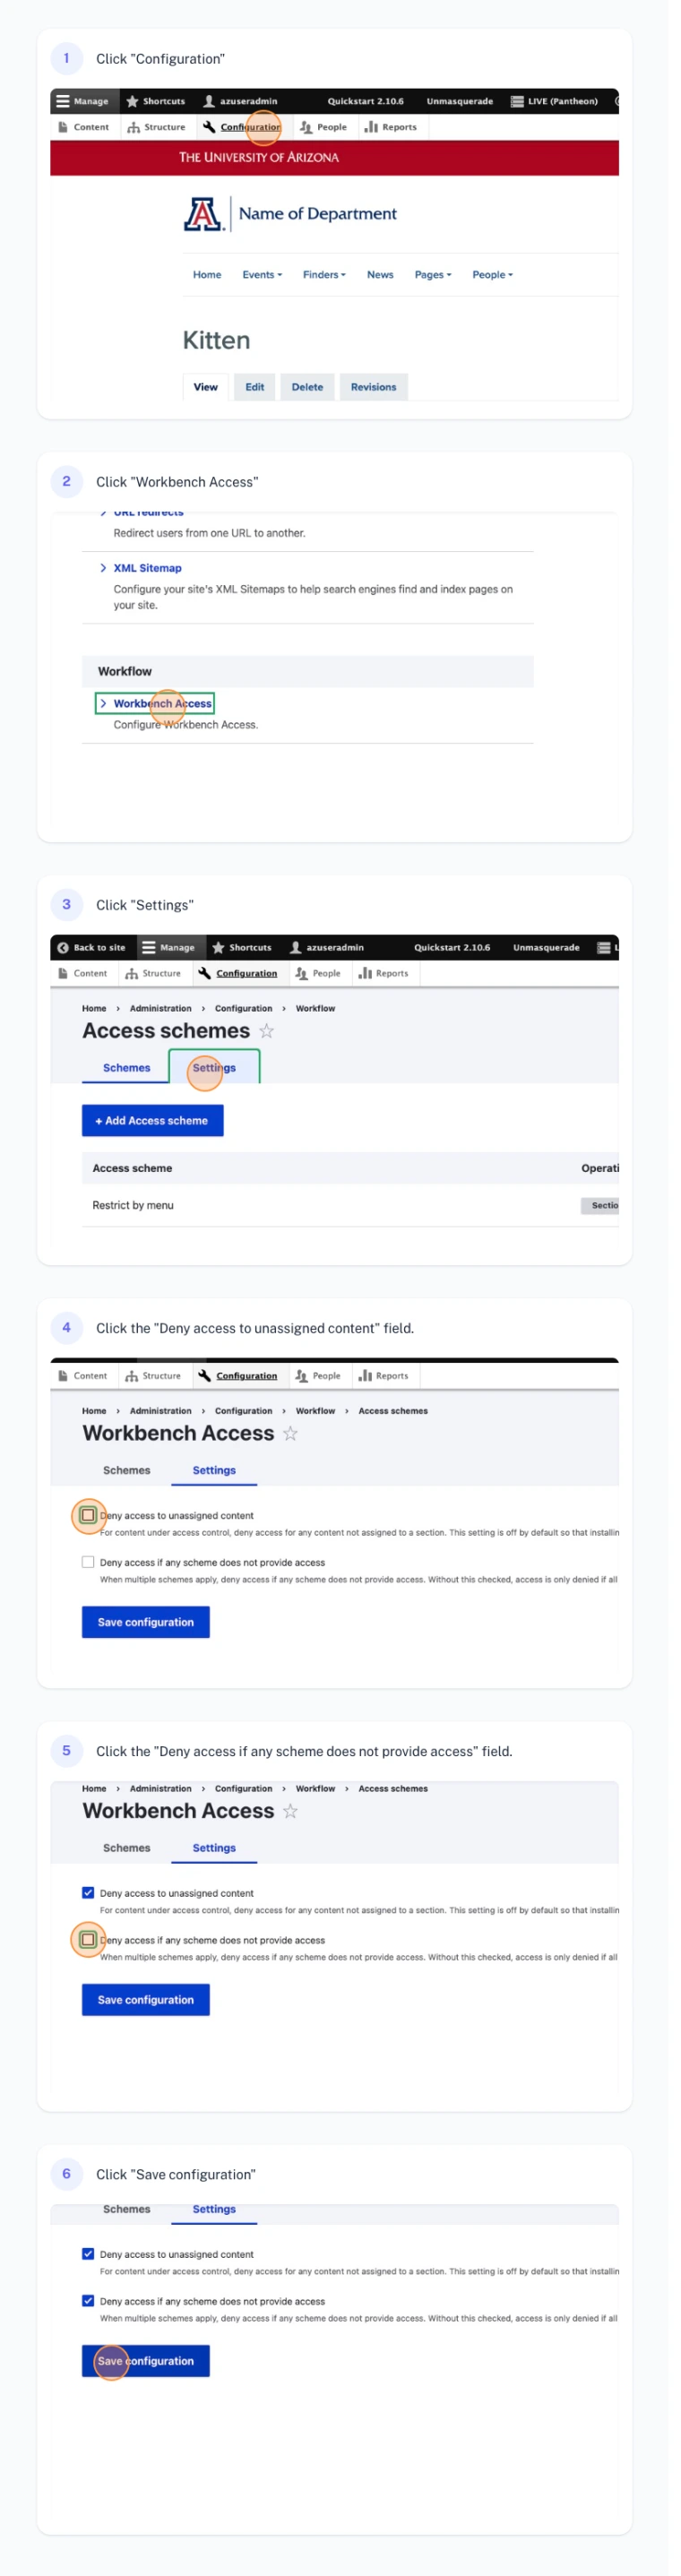
1. Click configuration
2. Click Workbench Access
3. Click Settings
4. Check all checkboxes
5. Save configuration
This guide provides step-by-step instructions on how to set up a workbench access scheme with menu restrictions. By following these steps, users can create a scheme that restricts access to certain menus, ensuring a more controlled and secure work environment.

1. Navigate to "Configuration" then "Workbench Access"
2. Click "Add Access scheme" and name the scheme
3. Select "Menu" from the dropdown and save
4. Select "Main navigation" to restrict to this menu
5. Select all content types
6. Click "Save"
This guide provides step-by-step instructions on how to add editors to Workbench access sections. By following these steps, users can easily restrict editing access to specific menu items and add specific users to those sections. This guide is helpful for anyone who needs to manage and control editing permissions in their website environment.
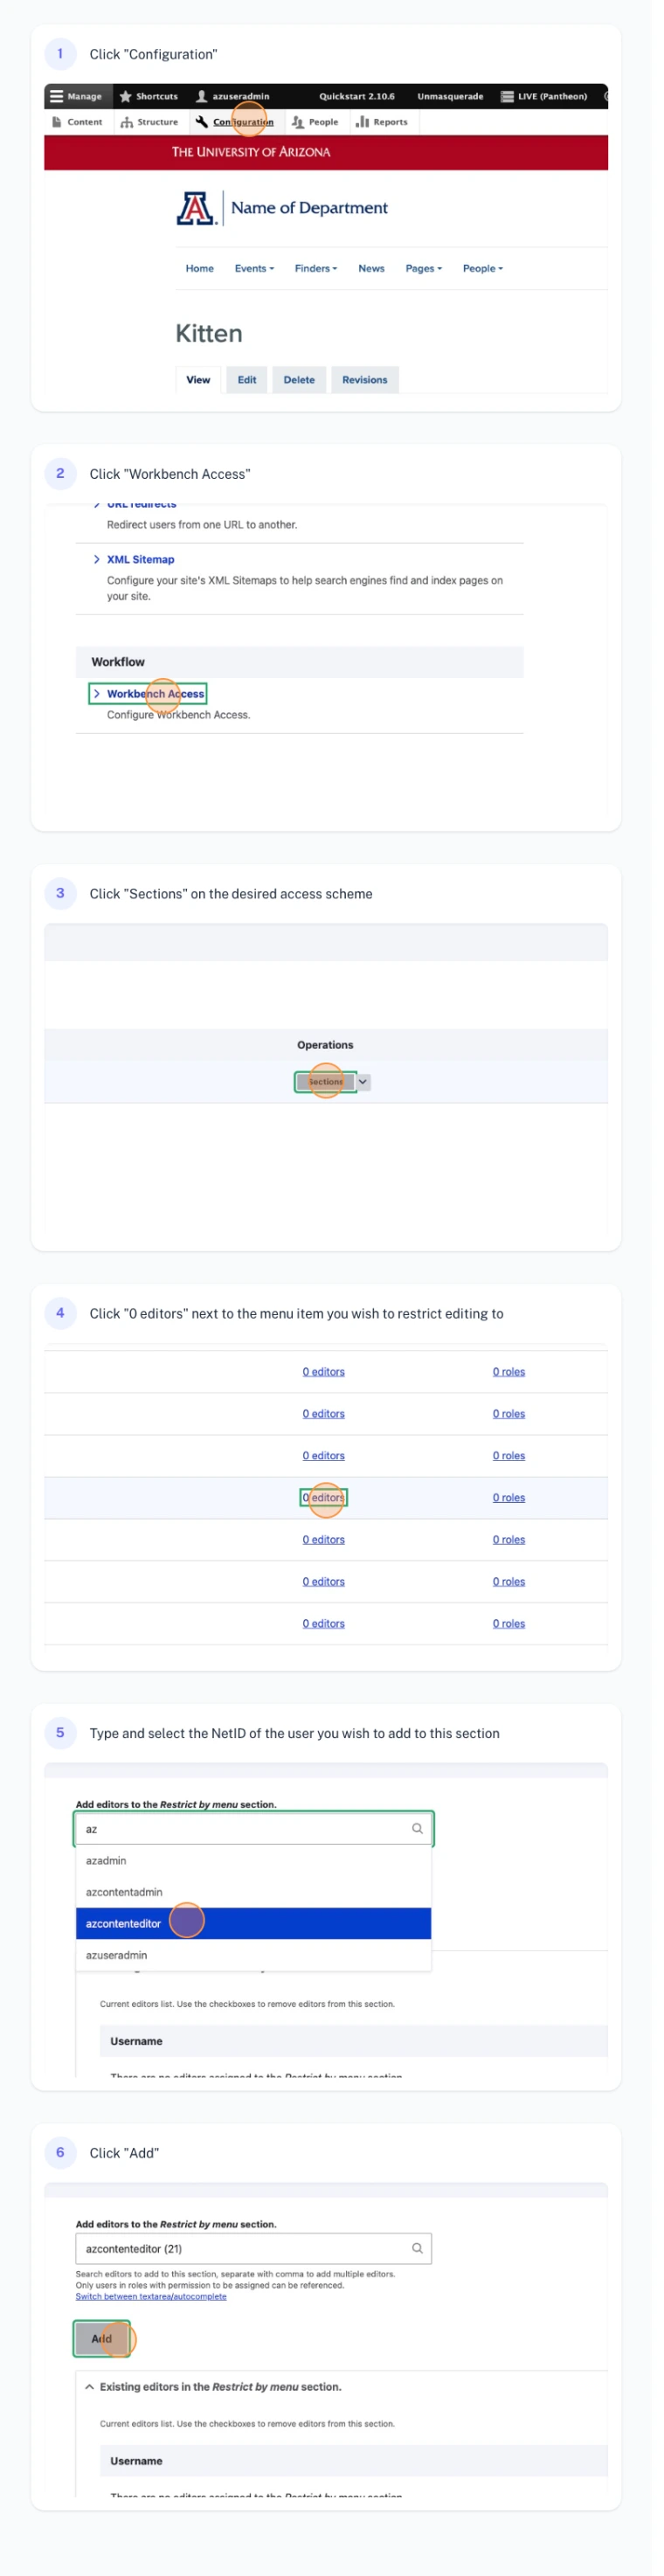
1. Navigate to "Configuration" then "Workbench Access"
2. Click "Sections" on the desired access scheme
3. Click "0 editors" next to the menu item you wish to restrict editing to
4. Type and select the NetID of the user you wish to add to this section
5. Click "Add"
This guide provides step-by-step instructions on how to clear the cache on a website. By following these simple steps, users can ensure that their website is running smoothly and efficiently, improving overall performance and user experience.
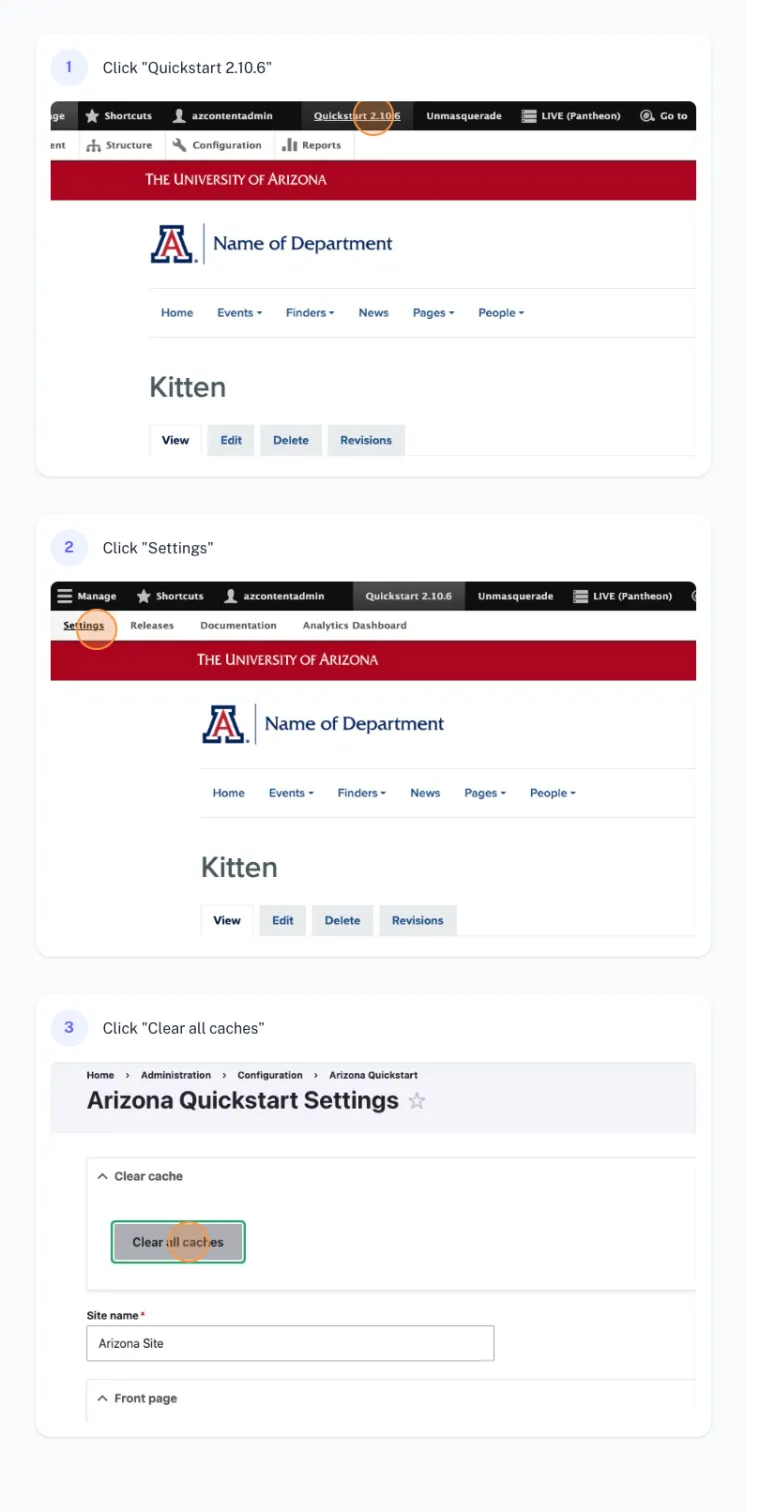
1. Click on "Quickstart x.y.z"
2. Click "Settings"
3. Click "Clear all caches"