
Social media block is useful for organizing clickable social media icons in one place.
Enable the Menu Link Attributes Module
Site Administrators can:
- Go to Extend from the top toolbar.
- Search for the Menu Link Attributes module.
- Check the box next to the Menu Link Attributes module.
- Click Install at the bottom of the page to enable the module.
Create a Social Media Menu
1. Add a new menu:
Structure > Menus > Add Menu > write the Title and Save
2. Click on + Add Link
i. Add Menu link Title, for example, Facebook
ii. Checkbox: Show as expanded
3. Expand Attributes:
i. Link: Add the social media link (For example, https://www.facebook.com/uarizona)
ii. Class: Add appropriate social media class. Select one from the list below. (For example for facebook use this class- az-icon-facebook az-icon-spacing)
4. Expand XML Sitemap
i. Change frequency: Daily
5. To add more social media links, click on + Add Link button. Repeat Steps 2-4 for other social media links as needed. (Appropriate classes for the social media icons are listed below)
Classes for the social media icons:
Site Administrators can add classes to menu links to add a logo to social media links. Classes are:
- Facebook Class: az-icon-facebook az-icon-spacing
- Instagram Class: az-icon-instagram az-icon-spacing
- X, formerly Twitter Class: .az-icon-x-twitter az-icon-spacing
- YouTube Class: az-icon-youtube az-icon-spacing
- Vimeo Class: az-icon-vimeo az-icon-spacing
Place the class in Edit Menu Link > Attributes (Drop Down) > Class.
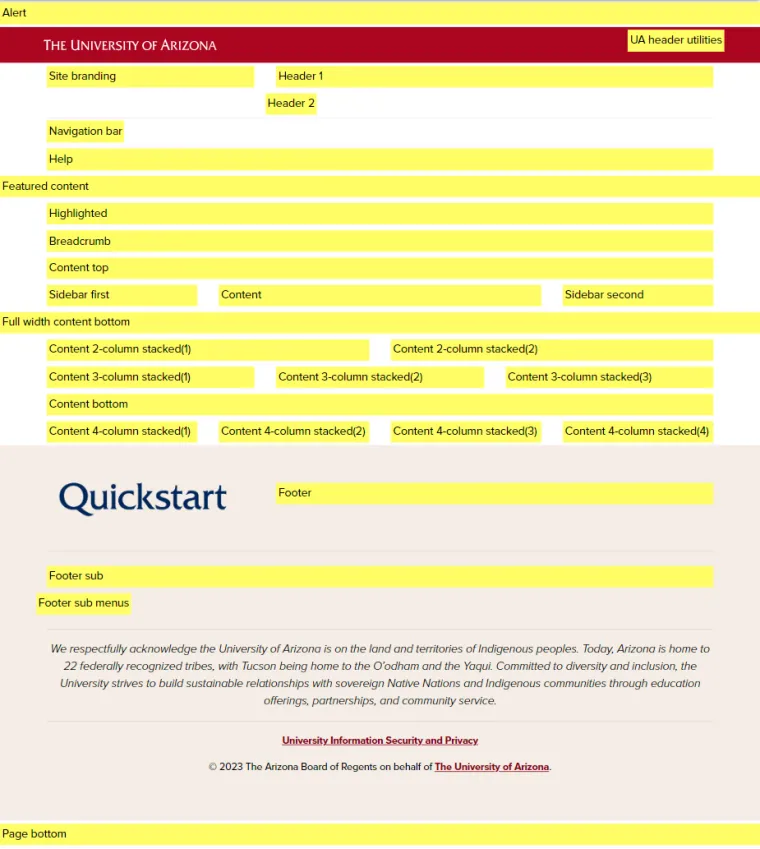
Place the new menu block into the desired region
Once you have created block, you can choose the region of the page you want the block to be displayed. Select the image below to view the block regions more closely.
- Navigate to Manage > Structure > Block layout.
- This will take you to a list of the regions of the page and the blocks displayed within each of those regions.
- Locate the region you would like the block to be displayed and select Place block. (See available them regions in the screenshot below.)
- This will display a list of the blocks that exist in your site. Search for the label you wrote in the Description field of the block you created and select Place block.
- Title is automatically set to be the same as the block label. Change it or uncheck Display title if you don't want a title to be displayed over your block.
- In the Pages section under Visibility, select either Show for the listed pages or Hide for the listed pages.
- Enter the file path (the /path section of the URL following the main site URL)
- For the Home page, the path is <front>
- Save block.
- Scroll down to the bottom of the next page and select Save blocks again to ensure your changes are saved.
Useful Links
